Our first little game
Every list of game development advice we've ever read includes this one point: don't start out by making your dream game. Pick something mind-numbingly simple, then cut the scope in half, and if you're lucky, your time estimate won't be off by more than double.
We brainstormed for a while, and ultimately landed on an idea that we thought was very simple, very good for a learning exercise, and very cute. Announcing... Boba Simulator 2020!!!

In Boba Simulator 2020, you're a new bubble tea shop employee, and the machines at the shop have a mind of their own. Your job is to make a good drink anyway. You can play it (in all its jankiness) on itch.io. If you're interested in reading the source code, check it out on GitHub.
The core gameplay loop is just a bunch of bubble tea ingredients falling from the sky, with you trying to catch the right amount to make the customer's order. We figured this followed the "simple and low scope" advice really well; what could be easier to program than catching balls in a cup?
We ran into approximately 17 different major challenges related to catching balls in a cup
First of all, it turns out that doing good physics in a video game is really hard. Even when you're using Unity (which comes with a fully-featured physics engine) and doing something really simple, it's hilariously easy to run up against the limitations of trying to make a computer simulate the way the universe works once every 60th of a second.
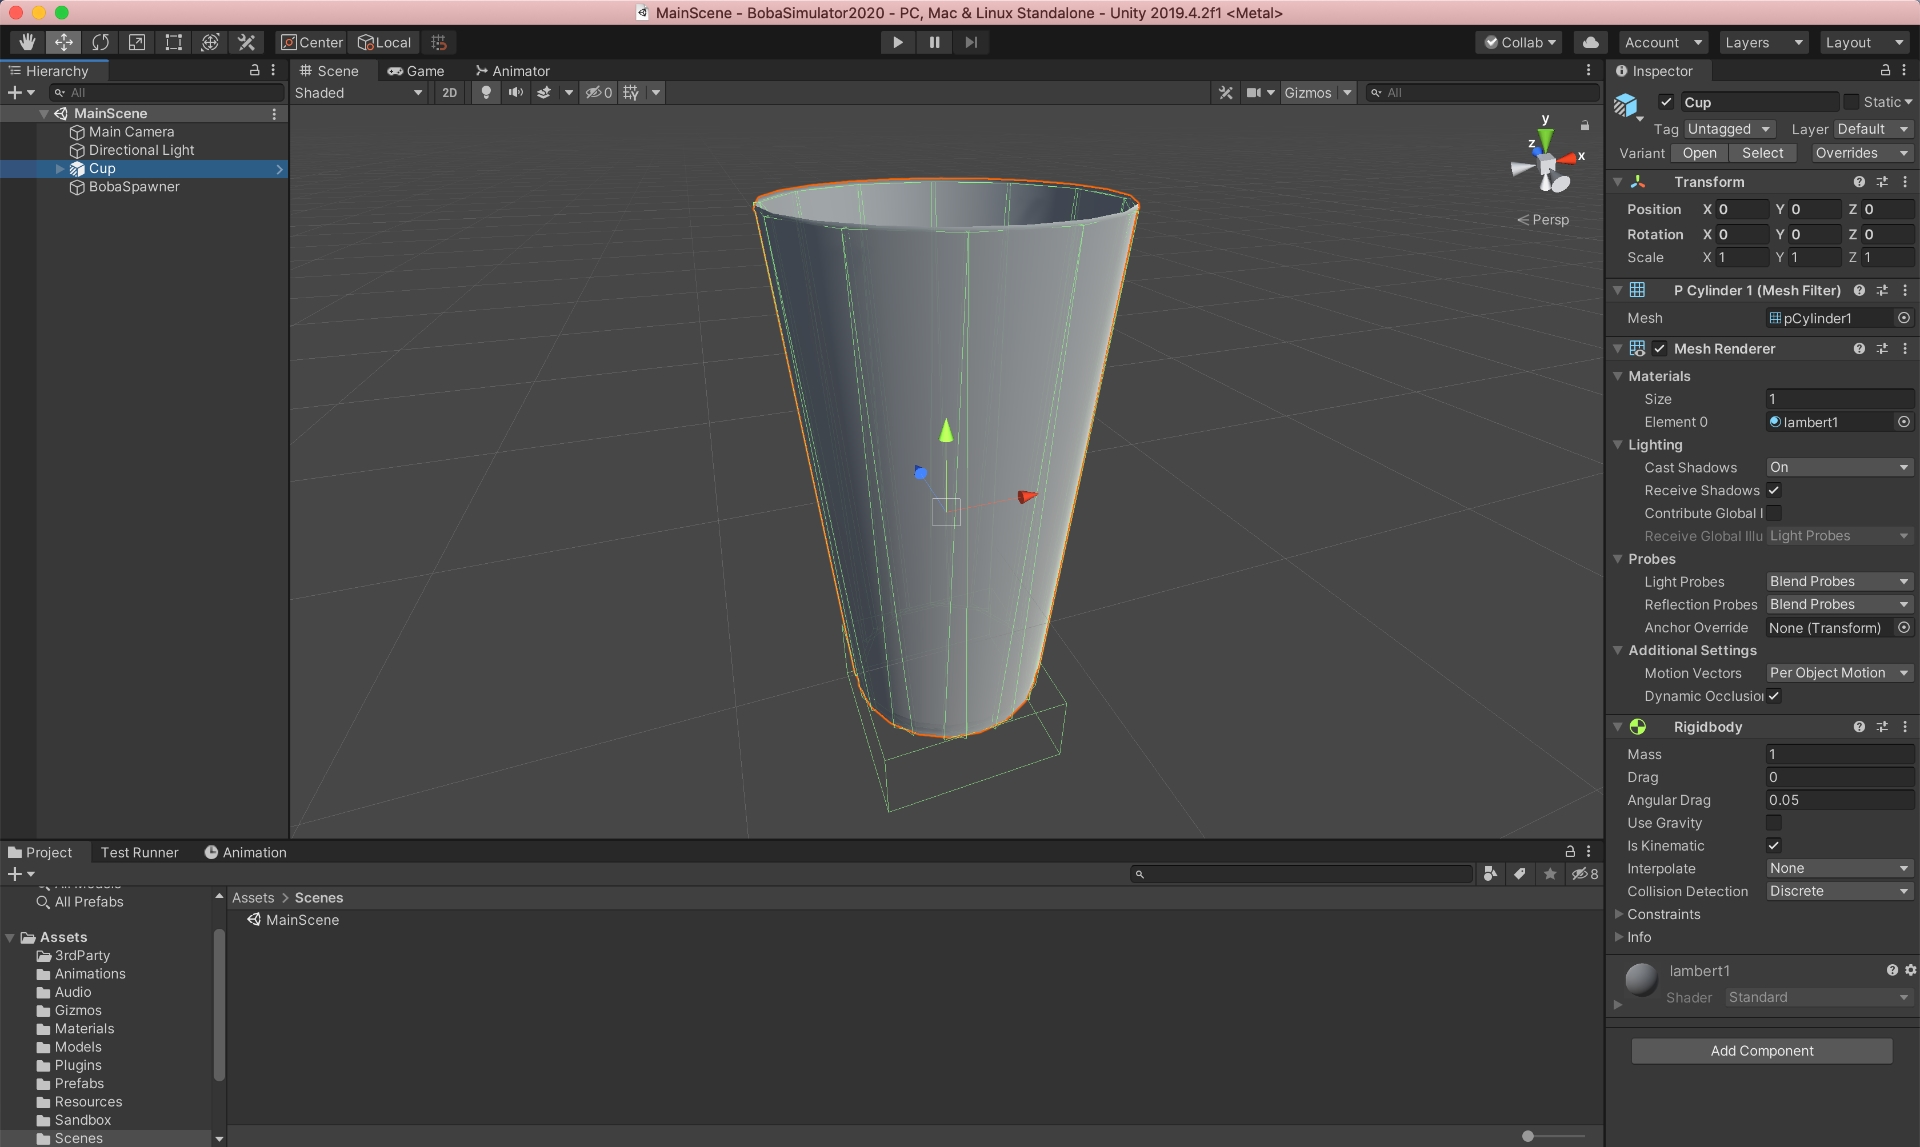
The mesh collider problem
Initially, we tried to make our cup's hitbox perfectly match the rendered model by using a Mesh Collider, but this idea turned out to be bad news. Ultimately, most Unity developers recommend against using mesh colliders in general, and doubly so for concave meshes (like say, a cup). Needless to say, our mesh-collider-cup didn't even come close to catching a single tapioca ball.

To work around the mesh collider problem, we tried making a "compound collider": 13 child GameObjects parented under the cup GameObject (12 for the cup's sides and one for the bottom). This technically fixed our mesh collider woes, but it also introduced us to a bigger set of woes: running a physics simulation with fast-moving objects involved.
The fast-moving object problem
A game's physics engine has many jobs, and one of the core ones is to run through all the colliding objects on every frame and apply the proper physics calculations to them.
With an object moving at a normal speed, this works great. It'll only just barely start to collide with another object before the physics engine detects it and does the right thing.
With an object moving very fast, like say, a falling tapioca ball, this totally breaks down.

This diagram, from Nilson Souto's post on collision detection illustrates the issue well. It's a long post, so here's a shorter and more amateur explanation:
On one frame (t1 in the diagram above), the tapioca ball may be far above a solid surface, but due to its high speed, it may have moved all the way below this solid surface on the very next frame (t1+1 in the diagram above). In this situation, the tapioca ball is never considered to actually be "colliding" with the surface, so the physics engine never gets the chance to perform its calculations on it.
We did some research and found that pretty much everyone who has ever put a Rigidbody on a Unity GameObject has run into this problem at some point. This research led us to two simple solutions. Here's what they are and why they didn't work:
The first simple "solution": enable Unity's CCD option
CCD (Continuous Collision Detection) purports to fix this specific fast-moving object problem at the cost of efficiency. Since Boba Simulator 2020 was meant to be very simple, we weren't concerned about the efficiency cost, and were excited about what looked like a magic solution. However, once we enabled it, we found it only worked about 10% of the time.
As it turns out, CCD isn't a catch-all fix for the fast-moving object problem. It can help shore up small inconsistencies with faster objects, but worst-case scenarios like bullets being shot at a wall (or tapioca balls being shot at a cup) will still beat it.
The second simple "solution": make the cup's colliders thicker
This would've worked if we only had the bottom of the cup to think about. We could make a super-thick invisible collider that starts at the cup's visible bottom and goes way down the screen. This would successfully generate collisions even if the tapioca ball fell really far on a single frame, which would let Unity's physics engine do its thing!
Unfortunately, we also have to think about the cup's "walls". If we make their colliders thicker, we have to decide whether to grow them outwards or inwards. Growing the walls outwards would result in a bunch of tapioca balls randomly bouncing off of what looks to be thin air. Growing the walls inwards would be even worse: no tapioca balls would be able to even make it into the cup.
The actual solution: write our own physics engine
Just kidding. Mostly.
The solution that worked was to take over from Unity's physics engine once the boba enters the cup. We can detect this by adding a thick collider (as we discovered above) that starts at the top of the cup and goes really far down. Once a collision is detected here, we disable physics on the tapioca ball and start manually moving it frame-by-frame to the bottom of the cup.
The tapioca ball placement problem
Taking over from Unity's physics engine solved the fast-moving object problem, but it introduced another one: where should a tapioca ball land once it's in the cup? Unity's physics engine would've figured this out for us, but taking over from it left this responsibility to us.
Our solution was to come up with a set of predetermined "landing points" for the tapioca balls. When we take over from Unity's physics engine, we simply pick the closest predetermined landing point and lerp the tapioca ball there. This does look a little weird in a vacuum...

...but it's pretty much unnoticeable in the chaos of the actual game.

The tea problem
It wouldn't be bubble tea without the "tea", but to our great dismay, tea is a liquid, and liquid physics are even more complicated to simulate than rigid body physics.
Liquid physics
We spent a few hours oscillating between reading scientific papers, watching Unity tutorials, and asking each other if we had any idea what they were talking about (the answer was never "yes") before we had the epiphany that we didn't need to care about any of this stuff.
Liquid physics simulations handle all the tricky cases that a liquid stream can get into, like colliding with the tip of a triangle and splitting in two down the sides. None of these applied to us except if the liquid stream hits the edge of the cup (literally an "edge" case), so we hand-waved it and got to make a huge simplification.
We created two simple 3D models: a simple tall cylinder model for the stream, and a solid cup-shaped model for the cup's liquid filling. Our plan was to cut off part of each model at runtime in various situations. The bottom of the stream model would be cut off when the cup is catching it, and the entire cup-filling model would be cut off at the beginning of the game, with the cut-off point being reduced as the cup gets filled with liquid.
We didn't know how to cut off parts of a 3D model yet, but surely this would be the first truly easy thing we had to learn right?
An introduction to the architecture of three-dimensional computer graphics
Our search for ways to cut off parts of 3D models had plenty of results, but they all led us to one conclusion: we had to learn shaders.
For the uninitiated, most of a computer's work is handled by its central processing unit (a.k.a. the "CPU" or the "processor"), but most graphics-related work is handled by its graphics processing unit (a.k.a. the "GPU" or the "graphics card"). This piece of hardware is designed to be super-efficient for only graphical work, and unlike the CPU, the instructions that a programmer can give to the GPU are extremely restricted.
A programmer communicates with the GPU via small programs called "shaders". Unlike regular computer programs (which communicate with the CPU), shaders are restricted to using the very small number of instructions that the GPU understands. In exchange for this restriction, shaders are blazingly fast. Even complex shaders can run millions of times per second on the GPU without slowing things down.
The job of a shader is generally to tweak the positions of a scene's polygons, or the colors of the pixels that will be drawn to the screen. In the case of our liquid shader, we wanted to prevent some of the liquid's pixels from being drawn to the screen, which is called "clipping". Specifically, we wanted to clip the bottom pixels of the liquid stream model when it's being caught by the cup, and the top of the liquid fill model when the cup isn't completely full.
To learn the fundamentals of shaders and get this pixel clipping effect going, we followed this fantastic series of tutorials by Ronja Böhringer. This got us all the way to the shader we needed! It took quite a bit of time, but surely our investment in building a strong understanding of HLSL and computer graphics architecture would pay for itself multiple times over in the long run right?
Shader Graph is the future
After upgrading our project to the Universal Render Pipeline, we discovered that our clipping plane shader was totally broken. We dug in and discovered the truth: surface shaders are no longer supported in the scriptable render pipeline. Instead, Unity developers are encouraged to use Shader Graph, a sort of visual programming language that allows building shaders by connecting nodes together on a graph interface.
Luckily for us, Abdullah Aldandarawy wrote a fantastic blog post on how to build exactly the same shader as above using Shader Graph. We learned the Shader Graph fundamentals with a Brackeys video, then followed Abdullah's post to rebuild our shader.
Our journey to get a working stream of tea was long and full of perils, but in the end, the results were worth it. Feast your eyes on this AAA-level graphical fidelity.

Other problems we ran into
We've only covered the most interesting problems we ran into. Below are a few other issues that we were too lazy to spend more than a bullet point's worth of text on.
- We were going to make our "liquid fill" model cup-shaped, but we were lining the boba up on the scene's Z-axis, so a cup-shaped liquid fill would cover all of the boba in the middle of the cup. Instead, we made our liquid fill trapezoid-shaped so it evenly covered all the boba.
- We wanted to make the ice start to float once the liquid was covering it. We started with a complex set of variables and offsets, but realized it would be simpler to use colliders. We learned that having a bunch of complex offsets is a code smell, and that when we see this in the future, we should switch to colliders.
- If you pour multiple colors of tea into the cup, we mix them together into a new color. We initially wanted to make this color mixture accurate to the real world. Unfortunately, color mixing on a computer is additive, while the colors produced by mixing real-world liquids are subtractive. Converting one to the other is such a complex problem, multiple scientific papers have been written on the subject, none of which contain anything easy to convert into C# code. Without this conversion, all mixed teas just ended up looking light gray. Ultimately, we decided on a simple trick: when a new color of tea starts landing in the cup, we just start lerping from the old color to the new one. While not accurate, this looks good enough to the human eye; the fade from one color to another is immediately obvious, and the colors generally stay bright and saturated.
- We wanted to play a video with our logo in it for a splash screen, so we used the Unity Video Player component, but the video filled up the whole screen and we couldn't shrink it down. After a lot of reading, we discovered that the Video Player component writes to the camera's near (or far) plane by default, which fills the whole screen by nature. To fix this, we changed our Video Player to write to a texture, then displayed that texture on a single quad in the scene.
Are we game developers now?
This project was a great learning experience for us. We found it super funny how often a tiny problem would balloon into a massive amount of work, but we also found the work extremely gratifying. While we still have tons to learn, we feel way more comfortable working in Unity and solving game development problems. You can check out all our assets and source code for Boba Simulator 2020 on GitHub.
Now that we're done with this project, we're starting work on our first commercial game! If you're interested in hearing more from us as we build it, you can stay in touch via the following channels:
- Sign up for infrequent updates from our newsletter.
- Follow us on Twitter. Bee's Knees Games has an official account, and our personal accounts are @jessicard and @jakecard.
- Join our Discord! We'll be around to chat, and you can also pop in to leave a bug report or just say hi.
Thanks so much for reading! We're looking forward to bringing you more updates soon :)
Love,
Jessica and Jake